Cross-stitch alphabets are a fantastic tool for personalizing your embroidery projects. At The Fresh Cross Stitch you can find tons of different cross-stitch fonts to create a custom name, a meaningful quote, or a decorative monogram. Alphabet patterns give you the freedom to design your own messages, but they are not always easy to use. In this article, I’ll walk you through the steps to effectively use cross-stitch alphabet patterns in your projects, from planning to stitching.
Step 1: Choose your font style
Before you start stitching, decide on the style of the font you want to use. Cross-stitch alphabet patterns come in a variety of fonts—from simple block letters to intricate cursive styles. Choose a font that matches the overall aesthetic of your project. For example, a bold, blocky font might be great for a modern, minimalistic piece, while a more ornate script would suit a vintage or decorative design.
At The Fresh Cross Stitch you can find convenient alphabet bundles, so you will have a complete source for cross-stitch fonts. In every listing, you will find a mockup where you can see what the letters look like.
Step 2: Plan your design
Once you’ve selected your alphabet style, it’s time to plan your design. Think about the message or name you want to stitch and visualize how it will look on your fabric.
If you’re new to cross stitching, don’t worry. You can check my blog article on how to read a cross-stitch pattern, and read other recommendations for newbies in the ‘Cross stitch for beginners’ section.
Measure the space
Measure the area where the text will go. This will help you determine the size of each letter and how much room you have for spacing between letters and words.
If you want to calculate the measurement of your design in inches or centimeters, use my free cross-stitch calculator. You simply have to input the number of stitches and click on ‘Calculate`. You will then see a table with the measurements, and you will know how much fabric you will need.
This step is particularly important if you’re using other elements in your design, like wreaths or frames.
Consider letter size
My alphabet patterns come in grids that show how many squares each letter will occupy. Before buying, you will find the reference stitches for letter A. Once you have purchased the alphabet, you can simply count the stitches per letter, and plan them on the canvas. Make sure the letter size fits within your fabric and overall design. Larger letters will be more noticeable but will also take up more space.
Step 3: Adding extra elements
Combining a great font with a wreath cross-stitch pattern is one of the simplest and best ideas to create your own design. If you want to use extra elements aside from the text, simply choose a style that matches your font (or vice versa), and measure the inner space.
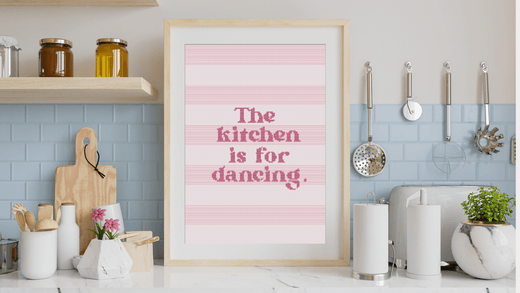
Other extra elements you can add are frames or simple repetitive backgrounds. As you can see in the examples below, I have added a striped background and a vichy background. In order to do so, I just plan a pattern and decide how large I want the stripes or squares to be, and repeat this pattern throughout the design.


Step 4: Choose your preferred alignment
Decide if you want your text to be aligned to the left, right, or center. For names or short phrases, centering often looks best, while longer quotes may need left-alignment, but this is a matter of style and personal preference.
How to align the text for a centered design
If you opt for a centered design, it is important to find the center of the fabric, and plan accordingly so the final design looks symmetrical. If you have followed the previous steps (measuring the space and the letter size) you will know the dimensions of your text in stitches and inches or centimeters.
Here you have an example of a centered text:

And here you have how it would look like on a pattern. When you don't have a pattern, you have to figure out the center of the text. You can do so by diving the text into two. That's the middle of it.

How to align the text to the left or to the right
Either if you want your text to be aligned to the left or to the right, you don’t necessarily need to mark the center. Decide where you want your text to start, and then make sure every line starts in the same vertical axis, like in the example below.


How to align the letters on the horizontal axis
If you want the letters to be aligned, make sure you start stitching them in the same horizontal axis on the bottom side. Take into account some letters are not exactly the same height, so it is advisable to start stitching them from bottom to top. In the example below, you can see an example of irregular letters and how they start from the same bottom horizontal axis.


If you want to be playful and place the letters irregularly, just plan a pattern and count the stitches accordingly. For instance, in the example below, I have opted for unaligned letters to give a more dynamic look.


Step 5: Map out the text
Before you start stitching, you can map out the text on the canvas, graph paper or in a cross-stitch app. If you’re confident enough, you can skip this space, but it won’t hurt to draw a little draft first. This is especially helpful if you’re working with more than just a few letters, as it allows you to play with the layout. Here’s how you can do it:
- Mark the words: Using the alphabet pattern as a guide, you can mark every letter on the canvas with a soft pencil, on graph paper or on a cross-stitch app. You could also mark the end of each word or just the borders, so you will have an idea on when the design starts and finishes.
- Space the letters: Just like when you use a font, the spacing between the letters is a matter of personal preference. In cursive fonts, you may opt for leaving no space between letters, while in bolder fonts you may want to leave 1 to 3 stitches between them.
- Test different layouts: Play around with different layouts, especially if you’re combining the alphabet with other design elements, such as wreaths or frames.
Step 6: Start stitching!
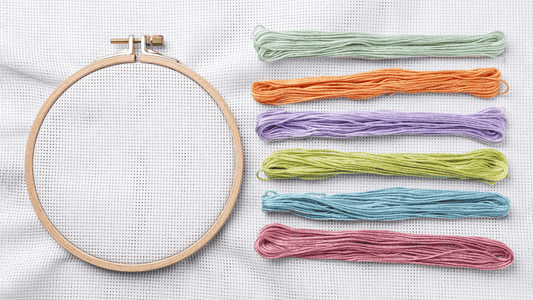
Once your design is planned, it’s time to prepare your fabric. Choose the fabric that suits your project—Aida fabric is onf the most commonly used types of cross-stitch fabrics, because it's easy to count the squares.
Now, you’re ready to stitch! Start by stitching one letter at a time, following the grid provided by your alphabet pattern.
When your stitching is complete, gently wash and iron your fabric if necessary to remove any creases or markings. Then, you can frame your project, turn it into a pillow, or use it as part of a larger quilt or wall hanging.
Bonus tip: Find inspiration from other artists
If you don’t know where to start yet, using platforms like Pinterest can help you figure out your design. You can find examples of motivational quotes, different ideas on alignment and composition, color palettes, backgrounds and much more.
Using cross-stitch alphabet patterns is a simple yet powerful way to customize your projects. By following these steps, you can create beautiful, personalized designs for yourself or as thoughtful gifts for others. Happy stitching!
